Installation Guide
The TopHat Framing Systems' metal reroofing subframe is intended to be installed as an engineered system. Always consult with a registered engineer during design and before installing a TopHat metal roof retrofit system. The TopHat sales and technical staff is available to assist you during your project for pre-planning, receiving and handling, subframe installation on existing purlins, and installation of the new roof system. Please contact us with any questions.
- Proper planning will help make the installation of the new TopHat system a success.
- When estimating or planning a new system, use great care to measure the existing rib or seam dimensions (width, height, rib measurements, etc). This will ensure the TopHat punch will overlay the existing panel. Also, measure multiple panels to ensure the existing roof panels are on module. Off module spacing can be handled in the field by cutting the TopHat to smaller pieces, but this will require additional labor as well as more splice details which can add unexpected costs to your project.
- It is important to note the spacing of the existing main frames on the structure. While not necessary, it is ideal to have the length of the TopHat match the structural bay spacing. This will help minimize the number of splices and aid in faster installation time. The TopHat subframe can be produced to custom length on larger projects. Contact TopHat for more information.
- Obtain good dimensions of the existing trim and flashing so the new ones will properly cover the existing conditions.
- Obtain good measurements of where the existing eave strut is in relation to the face of the existing wall system. This will be required to make sure your trim dimensions at the gutter or eave will fit the existing condition.
- Note necessary information and dimensions on all roof penetrations so that new curbs or dektites can be ordered to fit the existing conditions.
- Verify the size, spacing, and gauge of the existing purlins so that the correct size and number of screws can be determined.
- If the existing roof has gutters and downspouts, evaluate the location and size of the existing downspouts. Do they tie into an underground system? Is the existing spacing sufficient? Make sure the placement of any new downspouts takes into consideration the topography and existing grade.
- Verify if the existing metal roof system includes thermal spacing thicker than 3/8" under the panels. If so, special "stand-off" fasteners are required for TopHat attachment. Verify thickness of thermal blocking and contact TopHat Framing.
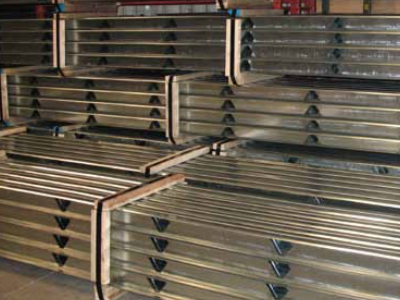
- TopHat subframe members will deliver to your jobsite or warehouse blocked and banded typically in 20' lengths.
- The installer is responsible for safely unloading material and checking for any damaged material. Please note quantity and description of damaged material on shipping documents and contact TopHat Framing immediately.
- Use care when unloading and staging materials so that the TopHat members do not get bent. The use of spreader bars is recommended for longer length pieces.
- Once the material is unloaded, store framing members off the ground with one end elevated for drainage.
- Take necessary precautions to protect TopHat members from damage or corrosion.
- If shop drawings were provided, review TopHat layout and stage material as necessary.
- When staging materials on the roof, be careful not to overload the existing roof structure.
- Existing Fasteners: Typically TopHat can be directly installed over the existing metal roof without having to remove the existing fasteners. This is especially true for existing standing seam metal panels or panels with minor ribs, such as R-Panel. If you notice that the existing fasteners are interfering with the installation of the TopHat subframe (i.e., TopHat base is not sitting flush on the existing metal panel), then existing fasteners must be removed.
- Existing Fasteners at Eave: On existing standing seam systems that are fixed at the eaves, it may be necessary to remove the screws at the eave in order to get the TopHat to sit flat on the existing panels. If this is the situation, we recommend waiting and installing the TopHat along the eave until you are ready to install the new panels.
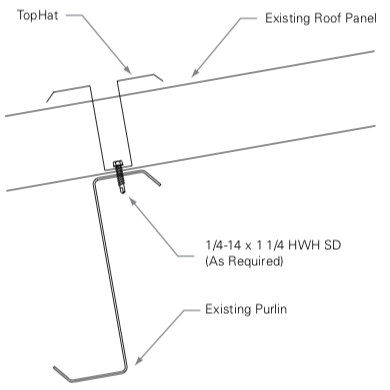
- TopHat Attachment: TopHat subframe members are typically attached to the structurally sound existing structural members with 1⁄4-14 x 1 1⁄4" Tek3 fasteners. The number of fasteners per linear foot should be determined by a registered engineer based on fastener pull-out and the wind uplift design criteria. For estimating purposes, fasteners are typically spaced 6" O.C.
- TopHat Layout: Install TopHat members directly over the existing structural members (purlins, joists, etc.). Typical purlins spacing is 5'-0" on center, but this needs to be confirmed. TopHat members typically come in 20' lengths, but this can be customized on larger orders. In some cases, the existing metal roof may be out of alignment due to improper installation. This may cause the existing panel ribs not to line up with the TopHat punches. In this situation, the TopHat member should be cut into smaller units and adjusted for proper installation.
- TopHat Splice: When two TopHat members do not meet directly at a rafter, splices are required. See standard details for guidance. When TopHat member meet directly at a rafter, the members can be butted without a splice.
- Weather-proofing: During installation of TopHat members, prior to installation of the new roof, the system will not be weathertight. We recommend that butyl mastic be applied between the TopHat subframe and the existing roof at attachment points in order to minimize water leakage before the new roof is installed. If not, only install enough TopHat members that can be covered with the new roof panel in a given day.
- Eave Condition: Depending on the overhang of the existing panels, it may be necessary to cut back the panels in order to install the new gutter or eave trim. Care should be taken when doing this to keep the existing structure as weathertight as possible during installation.
- Standard Details: There are a number of standard details that will assist in installation.
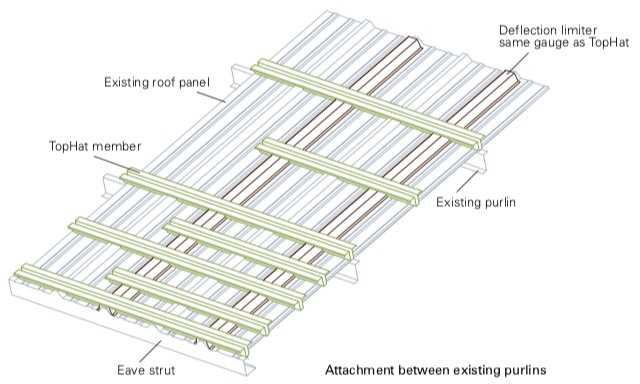
- Attachment between Existing Purlins: New building code and engineering standards now require roofs to withstand higher wind uplift pressures at critical edge and corner zones. Often, this requires attachment clip or fastener attachment between existing purlins. TopHat Framing’s Deflection Limiter provides a direct structural attachment to the existing framing and allows the TopHat subframe to be spaced at virtually any interval in order to meet the most stringent engineering requirements. Actual TopHat intervals at the edge and corner zones are determined by a registered structural engineer.
- Deflection Limiter Attachment: The Deflection Limiters are installed vertically along the major rib of the existing panel. Spacing is determined by engineering, but 24” on center is typical. After the Deflection Limiters are laid in place, the TopHat member is spaced as necessary.
- Existing Purlin Locations: At existing purlin locations, fasten through the TopHat member and Deflection Limiter to attach to the existing structural member.
- Between Existing Purlins: At locations between existing purlins, fasten the TopHat member directly to the Deflection Limiter.
- Insulation: Various types of insulation (i.e., fiberglass, iso-board, spray-on, etc) can be installed between the existing and new metal roof.
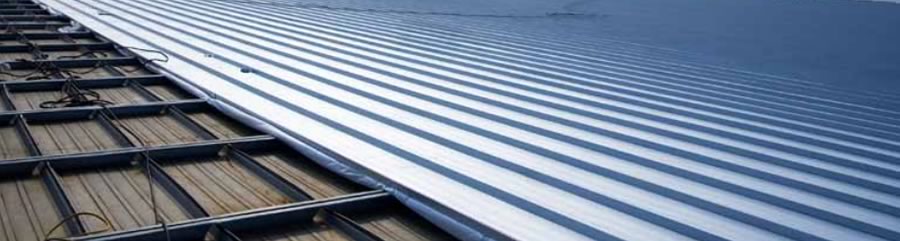
- New Roof Panels: Install metal roof panel system per panel manufacturer’s recommendations.
- Standing Seam Clips: Standing seam clips must be attached to each leg of the TopHat member. This requires a gap of at least 1.25” between fastener holes on the clip. Some clips do not fit this criteria and bearing plates may be required.
- Trim/Flashing: Fabricate and install new trim, flashing, and gutter as recommended by panel manufacturer. Please note that some trim dimensions may need to be increased because of the increased depth of the roof system.
- Weathertightness: When planning the installation of the new roof, it’s important to keep the existing roof as weathertight as possible during construction. Leaving the existing trim and flashing in place as long as possible will help keep the existing roof weathertight. Leaving some trim and flashing in place and installing larger pieces over the existing may be a good option for maintaining a weathertight roof during the installation of the new roof system.
- Standard Details: There are a number of standard details that will assist in installation.